|
I’ve got a couple of cheap commercial parting tools in my lathe tool collection but these are too wide for many applications and not particularly versatile. For some time I have been contemplating making a better parting tool holder for using broken high speed steel hack saw blades. While you can grind a standard square section piece of tool steel to make an effective parting tool this takes a lot of grinding for a thin parting tool.
Who needs a parting tool? If you don’t have one then you’re going to be using a hack saw (either by hand or machine). This wastes material and requires an additional material handling and facing to finish the job. A parting tool is also useful for cutting grooves of various profiles.
Finally I’ve made the plunge.
The tool holder must conform to my tool post and get the top edge of the cutting tool to the job centre. I have a bunch of old 0.75 mm thick ½” wide hack saw blades that I have been saving for this purpose and also a fragment of a 2 mm thick 1 ½” wide blade. The lighter blades don’t have much lateral rigidity but they may still be useful, especially for plastics and aluminium. The heavy blade should be good for parting all manner of stock.
The first mission is to cut the heavy blade down the centre to form two ~ 15 mm wide tool blanks. These are plenty deep enough to resist cutting forces without chatter for a deep parting cut. The blade was marked up, a scrap straight edge was clamped to the blade and I set about cutting it to the template using Dremel parting wheels. About five wheels later (mostly ground to dust but a few failed and flew apart) I have two cutting tool blanks about 15 mm wide. This steel is really hard. I dressed one half up on a conventional bench grinder and got it near to true on an oil stone. The other half needs more work to grind back the teeth to about 15 mm width but there is no need to do this just now.
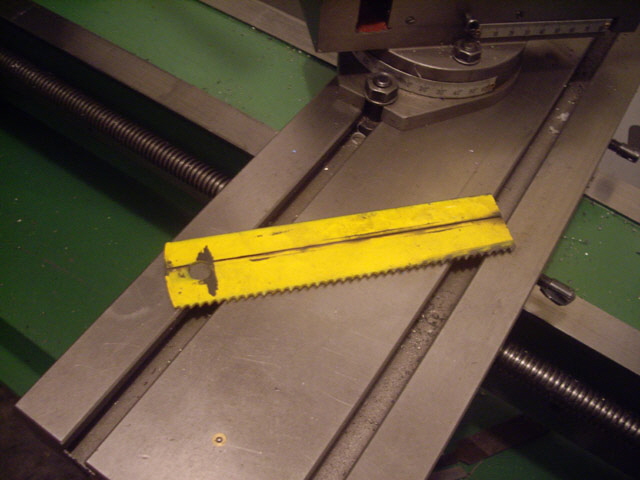
Figure 1. Hack Saw Blade Ground into Two Strips
I’ve designed my own tool holder. While there are a number of other designs, some just won’t suit my tool post, some seem unduly complicated, some have no versatility, some don’t appear to be very robust, and none will take a range of hacksaw blade widths and thicknesses. There are also some commercial offerings but these are relatively expensive and are specific to OEM tool steel profiles.
My design should be robust enough for moderate to heavy duty work. Once the tool is set in the tool holder it is very easy to mount and demount and (perhaps with the use of a spacer) will stay set to centre and perpendicular to the bed. The tool holder should remain secure in the tool post and is aligned directly off the sides of the tool post capstan.
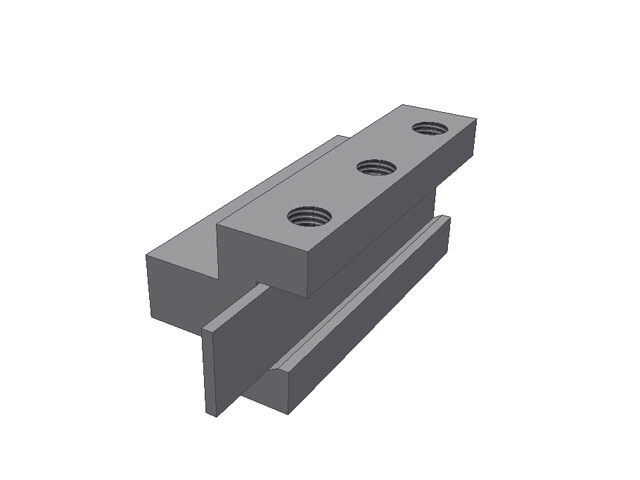
Figure 2. Revised Model with Vertical Bolt Lock

Figure 3. End Elevation Showing Tool Holder and Blade Profile
(Dimensioned to suit tool post, centre height and blade width.)
The tool holder should be a pretty straight forward milling exercise, but milling steel on my machine has always been a bit of a challenge because it is simply not rigid enough for bold cuts. I started with a 70 mm length of 31.7 mm square section mild steel and marked out for the first two cuts to form the tool holder clamp. Then mount the stock in a milling chuck, set square to the mill head with a dial indicator and proceed with end milling the shoulders.
The job isn’t perfect because the cutting speed was too slow, during two cuts the carriage gibs worked loose causing the job to jump under the cutter, and an odd vibration has developed in the mill belt train. However these dimensions aren’t critical so I’ll be re-cutting these shoulders tomorrow with the gibs tightened, the vibration sorted, at closer to 30 surface m/min (100 sfpm) with a feed rate of about 100 mm/min.
My original concept was to seat the hack saw blades against a vee notch and lock them down against the tool holder with two lateral eccentric cams fixed by M5 machine screws. But I’ve revised the design so the lock is from above directly from M6 x 1 bolts with a 45 degree tapered end. This makes for easier mounting of a range of blade thicknesses and reduces the machining effort.
After the tool post shoulders were cleaned up I turned the stock upside down so all subsequent milling was off the shoulders. Next I milled the blade slot and 30 degree retention slot, marked out, drilled and taped the bolt holes, and finally turned a 45 degree chamfer on the ends of some stock 16 mm long M5 x 1 bolts. The only critical dimensions were the bolt holes relative to the blade seat and the 30 degree retention slot to get the blade on centre.
There was only one minor calamity during the build. I dropped a 3 mm end mill and it broke. Bugger, but I have added the shank to my tool steel collection.
The machining took some time but I am reasonable pleased with the results, even though I haven’t removed the milling machining marks.
The cut-down 2 mm hack saw clamps rock solid in the tool holder and I have enough blade for 4 tools, each with two cutting surfaces and perhaps 20 re-grinds! The tool holder will also clamp a 1/2 “ 0.75 mm wide hacksaw blade but this requires a spacer between the blade and the tool holder to ensure secure clamping. Don’t use bimetallic flexible blades for parting tools, but any rigid high speed steel blade should be quite adequate for most materials (excluding perhaps alloy steels).
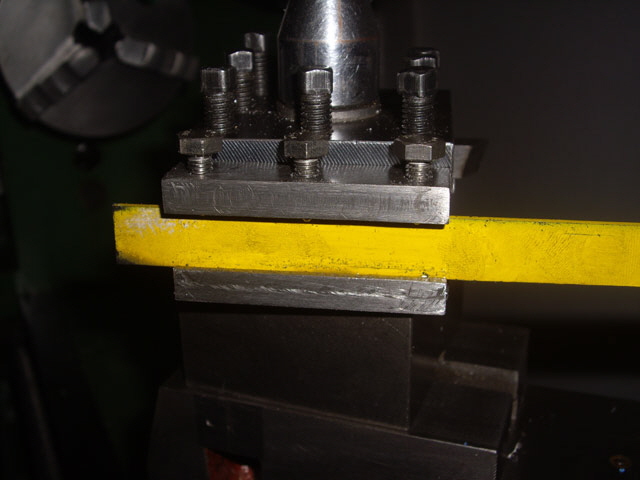
Figure 4. Elevation
(Note: Machine marks will be removed.)
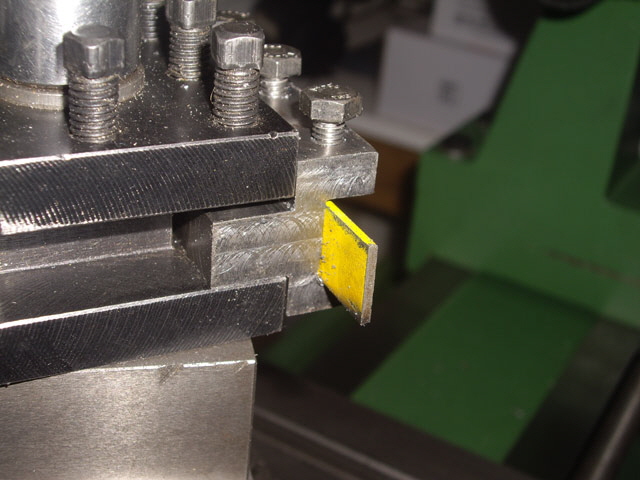
Figure 5. Blade Secure and Flush with Tool Holder
(The milled finish doesn’t look great but it is appreciably better than the tool post faces.)
The tool holder mounts very securely and quickly in the tool post with the blade perpendicular to the bed and the top surface pretty much on centre.
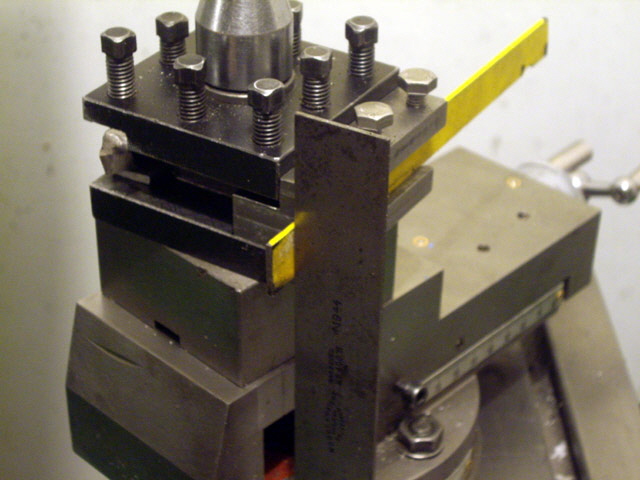
Figure 6. Blade Perpendicular to Cross Slide Bed
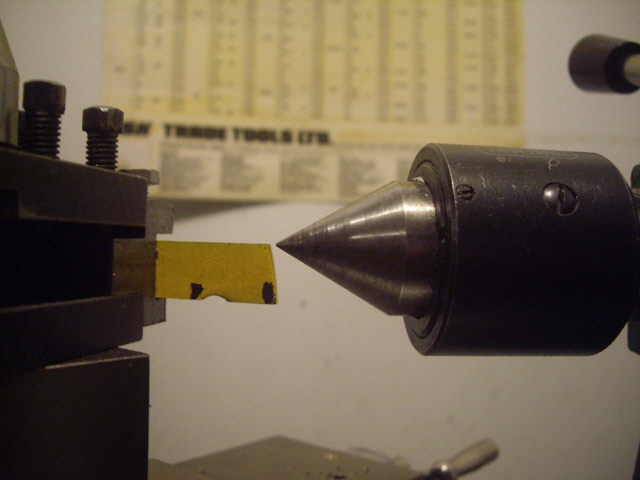
Figure 7. Top of Blade on Centre
Now I just need to do some minor grinding to make an appropriate profile parting tool (front rake, side rake, top rake and side clearance). If you’re new to parting then here are a few tips that you may find helpful.
Part with the tool on centre to avoid digging in or climbing.
Tool side and end relief are essential to prevent noise, heat and chatter.
You’ll need some back rake with steel and aluminium, but not for brass.
Lock everything down and try and part close to the chuck or a steady.
Use a steady feed with a constant chip or swarf flow rate. This removes heat and prevents rubbing of the tool on the job. Use the sound and feel of the cut to adjust for optimum performance.
Be aware that near the end of the operation the part will come loose. Either slow down or, if the part is bored, support it from the tail stock.
Take care when parting between centres as axial forces may pinch the tool.
Use an appropriate cutting fluid (except perhaps for brass). Turpentine works really well for Perspex. A regular motor oil is better than no cutting fluid for most materials except perhaps copper alloys which should be machined dry.
On large diameter stock keep the tool short to reduce flex on the initial cut. As the cut deepens it will guide the tool.
If the tool isn’t cutting cleanly then dress or sharpen it, check the tool angles, adjust the cutting speed and apply some cutting oil.
Job done.
|