|
How Not to Photograph the Northern Lights
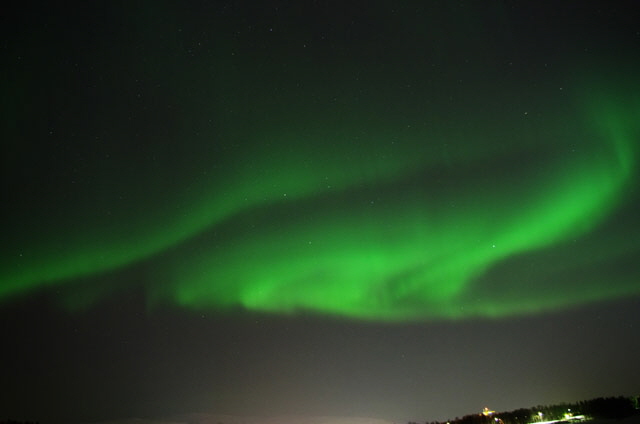
Figure 1. Northern Lights Above Tromso, Norway, February 2018
Before we start on photography, a question that you might be asking is why are folk fixated on the Northern Lights (Aurora Borealis) and not the Southern Lights (Aurora Australis)? The answer is that, short of trip to Antarctica, there is no land mass in the Antarctic circle (other than a few inaccessible islands). Whereas there are lots of places in the Northern Hemisphere where you can get between 60 and 75 degrees latitude (parallel) to see Northern Lights. Aim for the Arctic circle which is near the ‘sweet spot’. You’ll be spoilt for a choice of country of destination.
Now on to the Photo Preliminaries
The following is based on my personal experience and it worked for me. I can’t possibly cover everything here and there may be other techniques and settings that work better for you. Be prepared to experiment. Note that all of the images on this page have been compressed for browser speed from 16 MPixels.
You need to start with a half decent Digital SLR Camera. While you can get Northern Lights photos with a point and shoot camera or with an I-Fruit or Android phone the pictures will be less than satisfactory unless the solar activity is very high. Film cameras are becoming less common today but they can still be effective (indeed superior). Their main draw-backs are that you can’t get the instant feedback you may need to adjust your camera settings and you can’t change the film speed (ISO) on the fly.
Your camera came with a manual that explains how to adjust stuff to get the best performance from it. You probably read the ‘getting started’ section when your camera was new and then filed it in the box. Drag out that dusty manual and refer to it as you work through the settings instructions below.
You’ll want a wide angle lens with a large aperture. A quality ultra-wide angle lens with a large aperture (14 mm F1.8) is ideal but somewhat expensive. However you can get acceptable shots with an 18 to 55 mm F3.6 zoom lens. Figure 2 shows an ultra-wide angle prime Sigma lens which is ideal for the Northern Lights photography and landscapes. I tried to buy this exact lens after setting out on my trip but I couldn’t find one anywhere on route. So I ended up having to use a somewhat less capable Pentax 18 to 55 mm zoom.
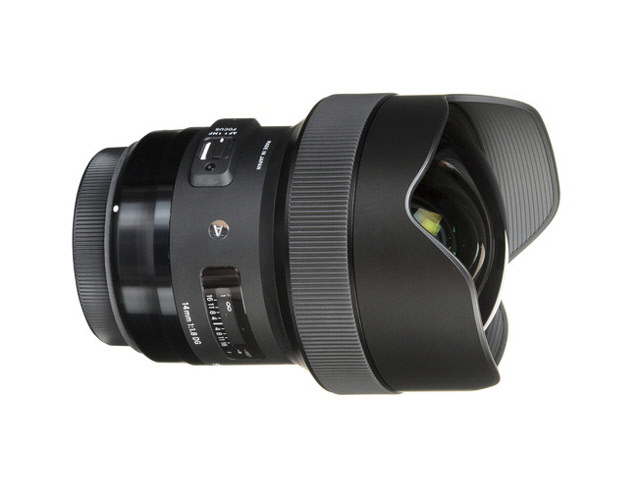
Figure 2. An Excellent Ultra-Wide Angle Sigma Lens
(The lens I really wanted but couldn’t buy in time.)
You’ll need a relatively sturdy portable tripod. Hand-held photos of the Northern Lights don’t work unless you are frozen solid or dead (and in either case you will struggle to press the shutter).
Charge the camera battery and have a charged spare on hand. Extreme cold is a sure fire way to discharge Lithium ion batteries, particularly if they are old. Pack the charger with an appropriate mains adaptor for your destination too.
Download any existing images on the memory card and clear it. Have a blank spare memory card on hand. RAW images can take up a lot of storage space and you want the capacity to take plenty of pictures. A 4 GB card should give about 150 RAW plus JPG images depending on the resolution of your camera.
Night Vision
As night falls your eyes will adapt to the dark through the physiological change from the cones to rod vision receptors on the retina at the back of your eyes. This process occurs over about 30 minutes (about he time it takes for daylight to turn to dark). But the instant your eyes are exposed to bright light then you will lose your night vision and you are right back to square one and night blind.
Digital SLR cameras have a back-lit LCD for displaying the camera settings and image preview. This is really handy for reviewing settings and images but be aware that it will decimate your night vision and make it hard to frame an image through the view finder (which means through the lens with an SLR camera). Half-pressing the shutter will turn the display off with some Digital SLR cameras. Your camera may also allow you to turn down the brightness of the LCD display. Otherwise try and close one eye when adjusting the camera and looking at previews. If you must use a torch then try and get one with a red filter or a red LED. This will preserve at least some of your night vision.
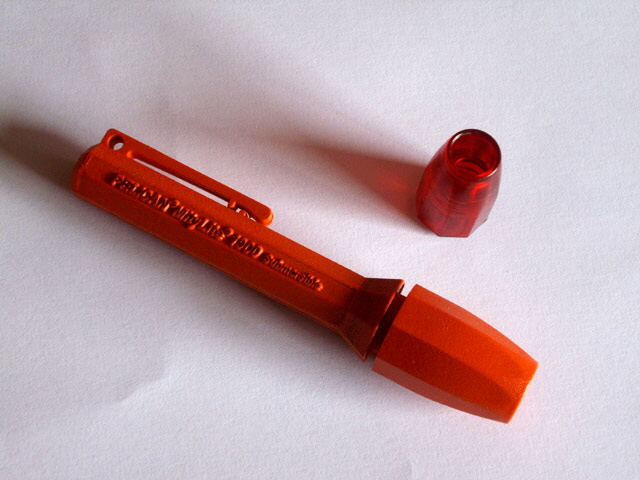
Figure 3. Small Pelican Torch with a Red Lens
Basic Camera Settings
I’m about to describe a bunch of default camera settings. You should set these up in the comfort of a warm well-lit room before you venture outside. You need to get familiar with your camera so that you can tweak settings in the freezing cold and dark. Trying to change the exposure, ISO or focus in the dark when your hands are cold to can be a bridge too far when you don’t even know which button to press or ring to turn. While my descriptions and photos below are for a Pentax K-5 II your camera will probably be similar as camera manufacturers are all striving for ergonomic operation.
You can test the settings without waiting for the Northern Lights by taking photos of star constellations in the night sky (but avoid the moon which will be too bright). This is also a really good way to get familiar with your camera. And make sure you practise with the same wide angle large aperture lens that you intend to use for the Northern Lights.
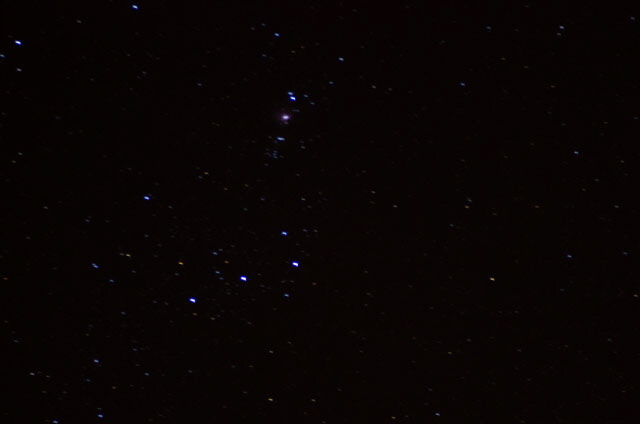
Figure 4. Constellation Orion Star Test. F6.4, 85 mm, ISO 1600, 20” exposure.
(Note the slight star streaks suggesting the exposure is fractionally too long.)
Turn off any shake compensation (usually represented by a green hand on the LCD display). We’ll be using a tripod for relatively long exposures so shake compensation will actually detract from image quality. This is adjusted through the camera’s settings menu.
Set the image mode to RAW (either with or without a JPG image) and at maximum resolution. Some cameras have different flavours of RAW (Pentax has the option of a PEF file). These should be fine. This is adjusted through the camera’s settings menu.
Set the white balance to Auto. This may not be ideal but it is a good place to start. We can adjust the white balance after the event if the photos are saved as RAW images. White balance is adjusted through the camera’s settings menu.
Set the camera mode to Manual. This will give us complete control over the shutter speed and aperture. You need to do this before you start making other adjustments or the camera may override your settings.
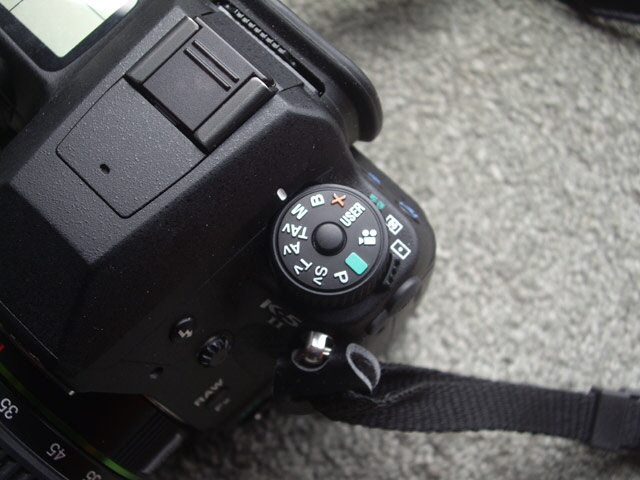
Figure 5. Set to Manual Mode
Set the delay timer to 2 seconds. Alternatively use a digital remote (external bulb shutters aren’t in vogue any more). This is necessary to prevent shaking the camera when pressing the shutter. The delay timer is accessed from the timer button at the top of the menu navigation cluster above the OK button.
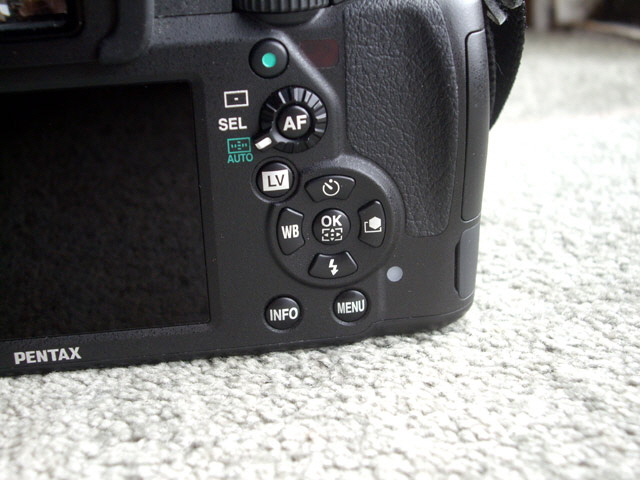
Figure 6. Delay Timer Button
Set the ISO level to 1600. This setting is the film sensitivity to light. More sensitivity allows reduced exposure times in poor light or to compensate for movement, but at the expense of increased image graininess. Grainy images don’t look good and no matter how much you post-process the images you will loose something desirable. In general a lower ISO is better.
To set the ISO level on my Pentax camera you press the ISO button behind the shutter and then turn the rear thumb wheel.
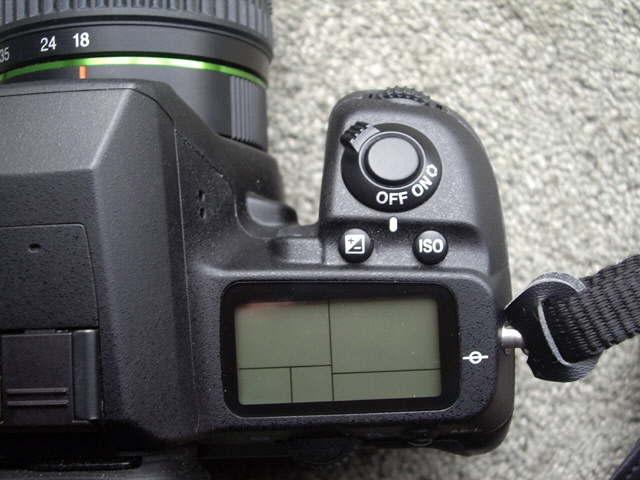
Figure 7. ISO Setting Button
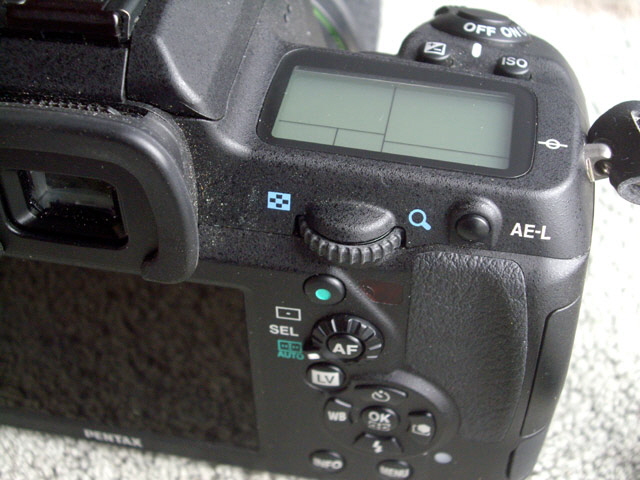
Figure 8. Rear Thumb Wheel
Set the exposure time. Use about 10 seconds for an F1.4 aperture lens and 20 seconds for an F3.6 aperture lens. 20 seconds is about the maximum exposure time before stars start to show as discernible streaks or trails. The streaks are caused by the rotation of the earth and there is not a lot you can do about this unless you have a geostationary polar mount (usually used with telescopes for long exposures of stars). Short exposure times will reduce streaking returning stars to bright points of light.
Press the ISO button shown in Figure 4 again and use the front thumb wheel to change the exposure. Note that the “ symbol in the LCD display stands for seconds.
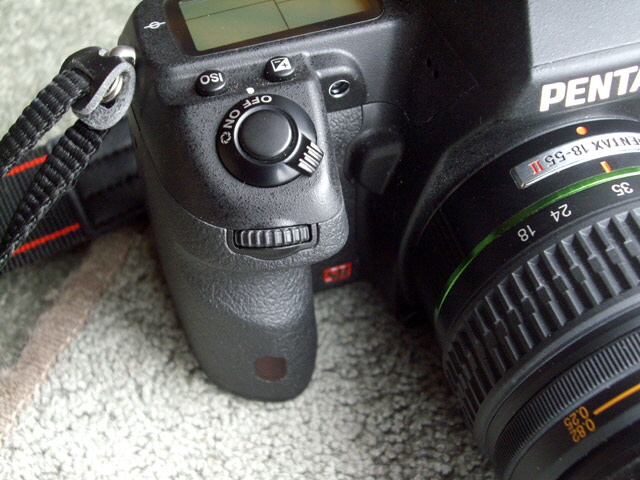
Figure 9. Front Thumb Wheel
If you are using a zoom lens then make sure that the field of view is set as wide as possible. Set the focal length as low as it will go for a wide angle shot showing as much of the sky as possible. This is typically set with the inner ring on the lens (closest to the camera body) as shown in Figure 10. You must set this before you set the F Stop with a zoom lens.
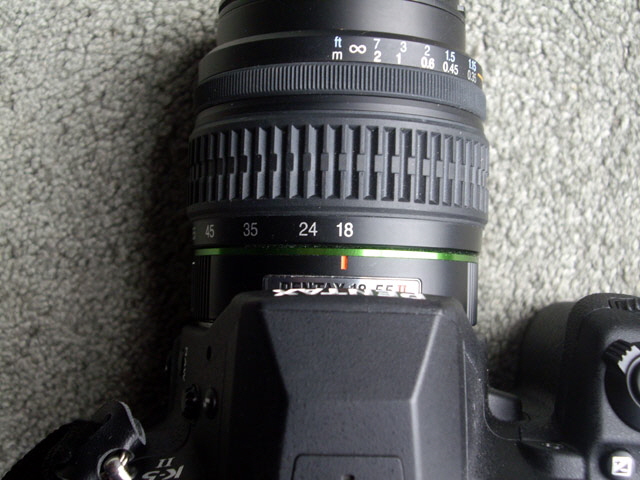
Figure 10. Zoom Lens Field of View Set to 18 mm (Wide Angle View)
Set the F Stop (aperture) as low as it will go. This will typically be in the range of F1.4 to F3.6 but will vary with the focal length of your lens. Smaller F Stop numbers let in as much light through the lens as possible. Use the rear thumb wheel (Figure 8 above) to change the F Stop.
Set the Autofocus to Manual. On my Pentax this is done with a lever switch on the the left hand side of the camera body near the lens.
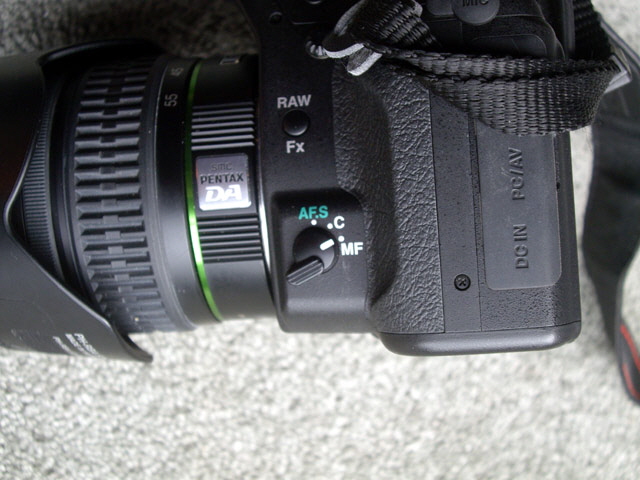
Figure 11. Autofocus Set to Manual Focus (MF)
Now set the focus to infinity using the outer ring on the lens. Align the index with ∞. Note that depending on how you carry your camera the focus setting can move all by itself. So you’ll want to recheck the focus setting when the camera is on the tripod. The Northern Lights are actually at a height of 70 to 200 km depending on the solar wind flux intensity which is effectively at infinity for your camera’s optics.
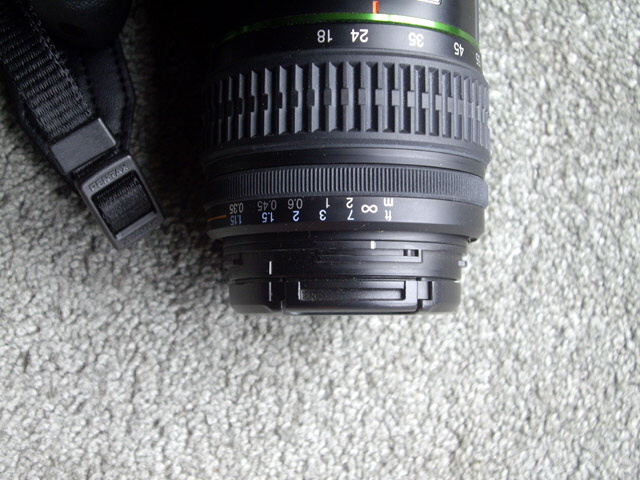
Figure 12. Focus Set to Infinity
Fit the camera to the tripod and align with the area of interest in the sky. It is generally good form to place any visible horizon in the image low and parallel with the image frame.
Remove the lens cap and place it somewhere secure (a zip pocket is good).
Photo Time
Turn the camera on and you should now be ready to take your first picture of the Northern Lights. Take the shot if you can see the slightest greyish white in the night sky (probably located to the North or East before midnight).
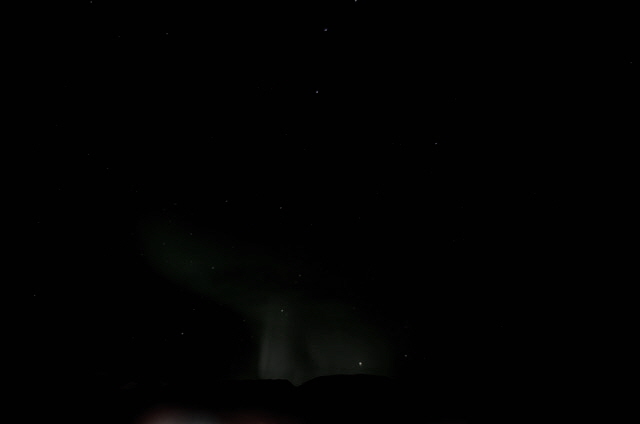
Figure 13. Faint Northern Lights (image adjusted to as seen by eye)
Once you’ve taken your first photo review it. If everything is set right on your camera then the visual image will turn that white haze into something that looks like the green swirls and veils that you’ve been anticipating.
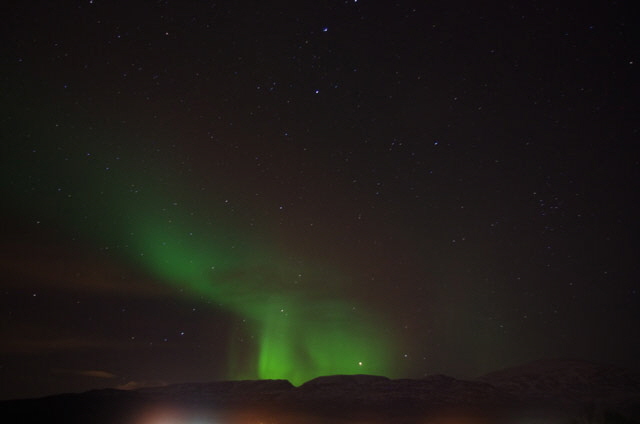
Figure 14. JPEG Image as Recorded by the Camera (the Same Image as Figure 13 Above).
Whoot, my camera can see the Northern Lights!
After image processing the RAW file with a simple tweak to the colour balance and the exposure the image is now a reasonable rendition of what we were expecting to see. Note that the orange in the sky and foreground (light pollution) is pretty much turned back to black and that the stars are maybe a little bit blue. Given that this wasn’t a high intensity solar event this is about as good as we can get with minimal RAW image processing.
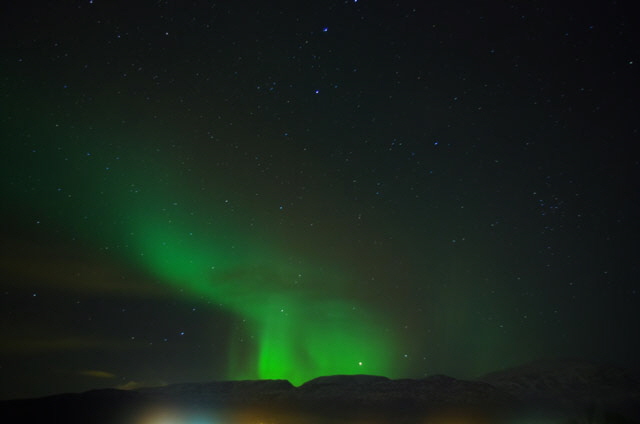
Figure 15. Post-Processing of RAW Image (the Same Image as Figure 13 Above)
When Stuff Goes Wrong
If there is no image at all then check that the lens cap is off, the battery is good, the camera is correctly aligned , and that you haven’t inadvertently zoomed the lens in.
If the stars are blurry then the focus has changed. Reset it to infinity.
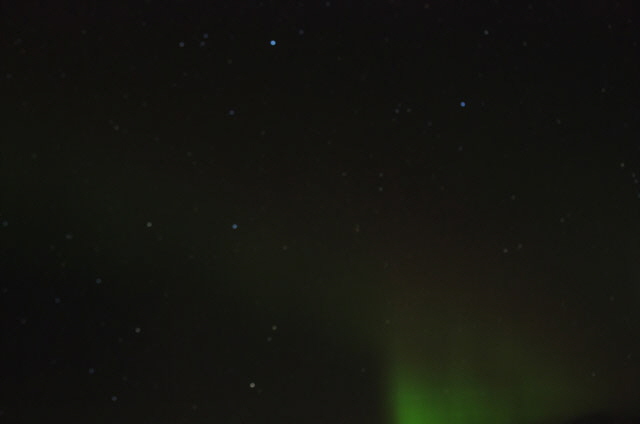
Figure 16. Lens Accidentally Zoomed In and out of Focus
(Note the blurry stars.)
Stars should appear as bright points. If they are showing as swirling streaks or squiggles then the camera isn’t stable or has been bumped. Re-adjust the tripod and tighten the tripod mounts and alignment fittings. If the streaks are too long then reduce the exposure time.
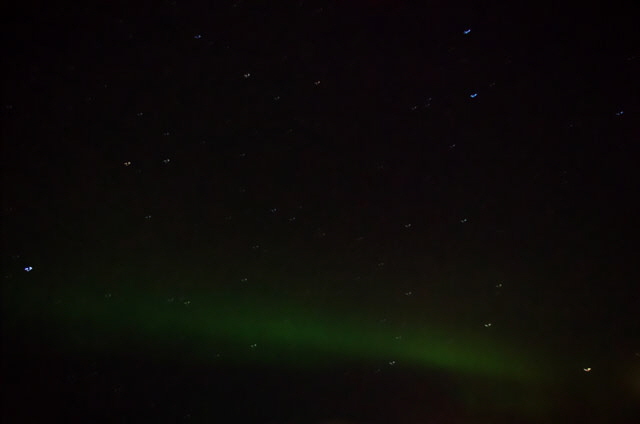
Figure 16. Camera Movement with Inadequate Exposure and/or ISO
(Note star tracks are squiggles.)
If the Northern Lights image is very faint then check that the aperture setting is as low as it will go, and either increase the ISO setting or the exposure. Increasing the ISO will improve the brightness at the expense of graininess. Increased exposure will improve the brightness but at reduced definition (Northern Lights swirls and veils will become regions of green and the stars will begin to streak).
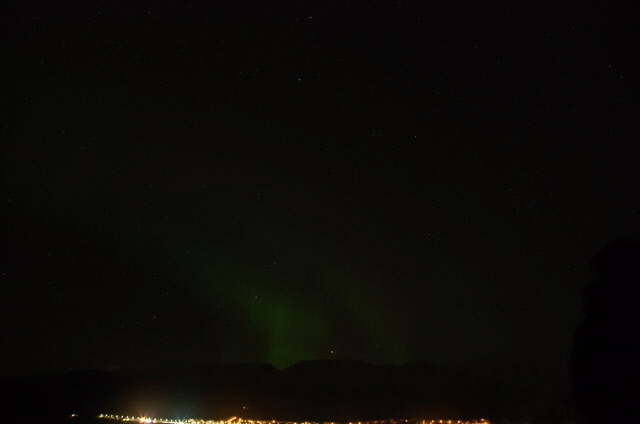
Figure 17. Insufficient Brightness due to Wrong Aperture (F6.3 when it should be F3.6)
If the image is really bright then reduce the exposure to 10 seconds or even lower. You’ve lucked in on the solar conditions and you can expect some really great shots.
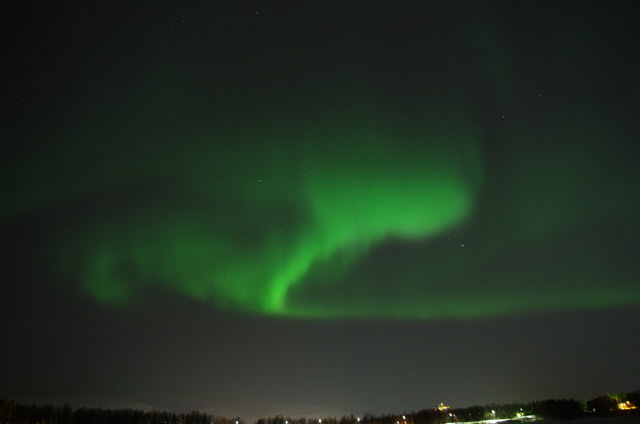
Figure 18. Reasonable Shot with 6 Second Exposure.
(Yes, this is pretty much what it looked like to the eye.)
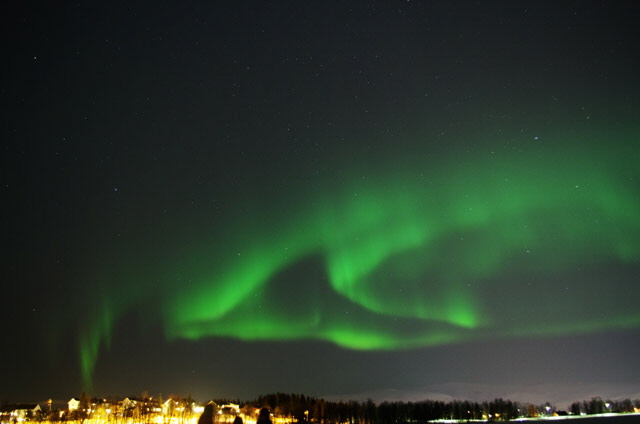
Figure 19. My Bucket List Shot with 4 Second Exposure. Whoot!
Post Image Processing
Most photos of the Northern Lights will need post processing to achieve an acceptable image. Some folk consider that this is cheating because a camera doesn’t lie. But actually, depending on your camera’s settings, your photographs won’t necessarily be a true rendition of what you saw. White balance and contrast are likely to need adjustment, but with RAW files you can also tweak a whole bunch of other stuff including colour balance and exposure. Post image processing does not actually alter the digital information collected by your camera CCD. It just reprocesses the data to compensate for the camera settings and conditions at the time the photograph was taken.
While tweaking a RAW image should not change the RAW image data I recommend that you save a copy of the original somewhere safe. When it all turns to custard you can revert to the original.
Now have a play with the image processing software that came with your camera and see what works for you. If your camera settings were about right then you’ll only need to make minor tweaks to the white balance (or colour temperature), exposure and perhaps noise compensation. If it all starts getting too hard then revert to the original image and refer to the software manual.
Now for Some General Advice…
Remember to take time out to look at the sky from time to time. Folk that are busy fiddling with their camera in the dark and cold are likely to miss the main event entirely.
Take lots and lots of photos and be prepared to tweak the camera settings. Unlike silver film your less than perfect images don’t cost you anything. The Northern Lights are constantly changing so every picture will be different. Most will be poor to moderate, some will be okay, and a few might be great. You can see all of my okay to great shots in high resolution at:
Drop Box
If you are truly in the Arctic Circle and it is winter and night then it will be cold. If it is windy then it will be freezing. Trying to operate a camera in the dark is challenging enough but if your hands are so cold that you can’t feel anything or if your body has started to shake then you’re going to be uncomfortable and can expect to have problems. So get dressed warm. Think head, hands and feet. Layer up (three thermal layers and a wind shell) with appropriate foot-ware. Sand shoes aren’t appropriate foot ware. Folk that get cold and go sit in a vehicle and don’t get to see the Northern Lights.
There are some items of clothing that that you might consider purchasing on your trip if you have a few days in transit in a large northern European city where they will be reasonably priced and good range of sizes and fit for purpose (cold). This includes snow boots from about 50 to 180 Euro and a good down jacket for around 300 to 500 Euro. The further North you go the less choice you will have for styles and sizes and the more expensive these items will be.
The further North you go the harder it will be to find casual accommodation so book in advance. Unfortunately one operator is pretty sharp with commercial practice that casts back to the wild west. On the basis of personal experience I suggest that you avoid EnterTromso Backpacker Hotel like the plague. You can read about this story here, here, here, here and here. I hate being ripped off!
A really useful accessory for wandering around on ice covered pavements and roads are pull-on boot spikes (like miniature rubber crampons). Falling over on the ice and getting damaged is a relatively common occurrence judging from the number of victims I observed on crutches. Injuring yourself is not conducive to seeing the Northern Lights.
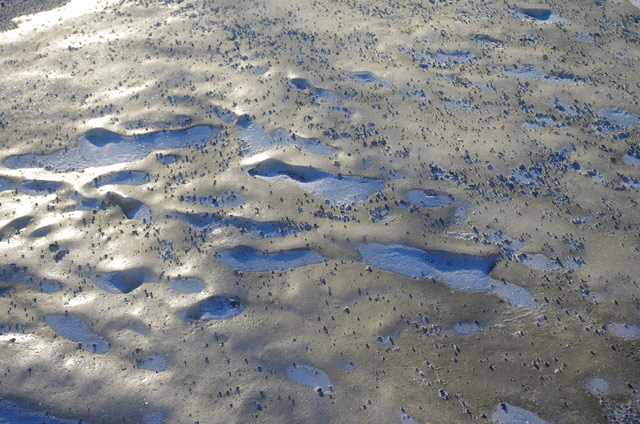
Figure 20. Slippy Ice is Everywhere
(Note the grit applied for traction in this road shot.)
When your camera is out in the cold the battery will deplete rapidly so keep it in a camera bag or inside your outer clothing shell until it is time to take photos. Thankfully the cold Arctic air will be relatively dry so you shouldn’t get condensation forming on the lens or inside the camera when you move it from warm to cold.
Get to your proposed viewing location early. The Northern Lights tend to ebb and flow and can go from nothing to extremely bright and back to non-existent in just a few minutes. If you get to your viewing location late then the show might be over before you arrive.
If you’re going to an unfamiliar place all by yourself then checking out the site in daylight can be helpful, particularly if it is by a fiord or on a frozen lake. You might like to know which parts of the lake you can safety walk on before it gets dark!
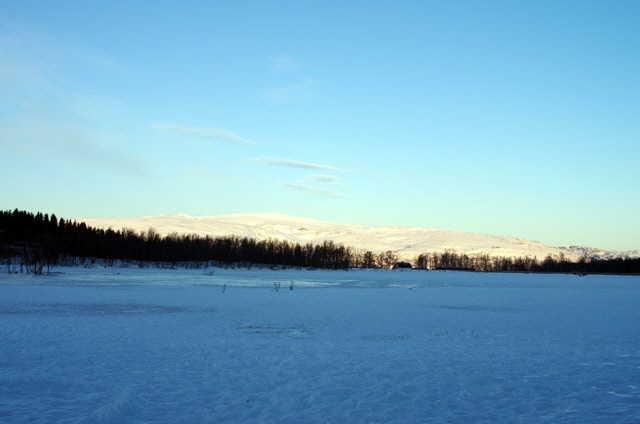
Figure 21. Frozen Prestvannet Pond above Tromso
(The water is about 4 m deep beneath the ice.)
A compass can be useful to orientate yourself. I spent my first night in Norway looking for the Northern Lights in entirely the wrong direction! Thankfully it was snowing so I didn’t miss anything. You can expect to see the Northern lights to the East and North in the early evening moving to the North, over-head, and West as time passes. Finding North in a strange place at night can be difficult, particularly when familiar constellations like the Southern Cross aren’t visible.
Try and get away from built-up areas as the light pollution will degrade your photos. Avoid having busy roads or aircraft flight paths in your image. Aircraft will result in bright long streaks and vehicle lights may over-expose your image.
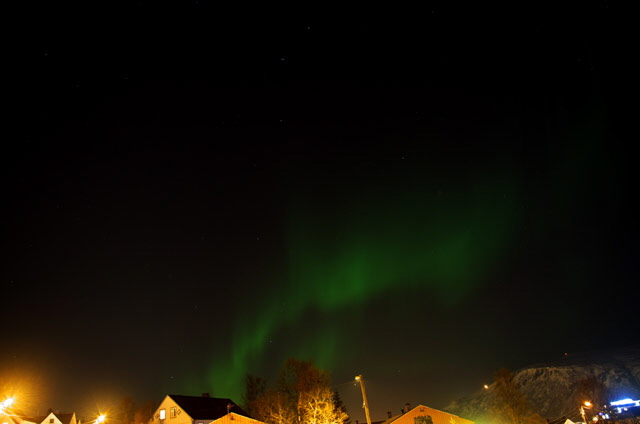
Figure 22. City Light Pollution - BAD
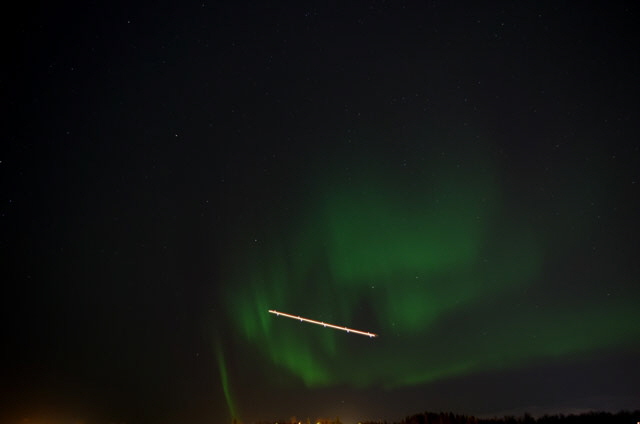
Figure 23. Aircraft Streak - BAD
(Hold the shot.)
If you’re with a bunch of other photographers then be aware that they will likely turn on torches, walk in front of your camera, or bump your tripod when you are taking your million dollar never-to-be-repeated shot. Try and move away from the crowd, and be considerate of others.
While being on a boat is a great way to escape from the city lights this is a lousy platform for taking photographs of the Northern Lights. Even if you think that the boat is dead stable on the water, engine vibration, wave action or the slightest swell will ruin your photos unless you have a gimbal mount. If you have never heard of one of these then it will be too expensive, and in any case it will only correct for angular (rotational - not linear) displacements.
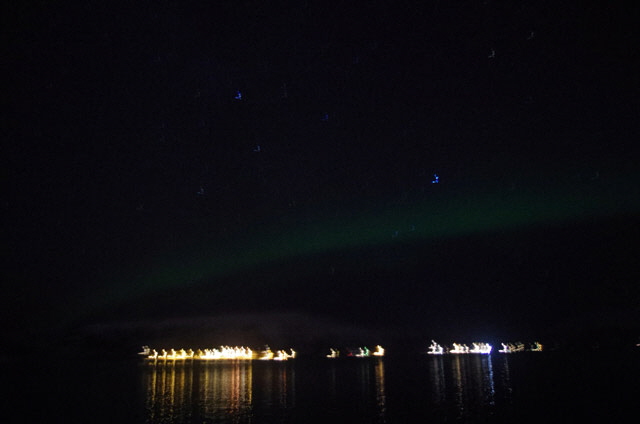
Figure 24. Attempted Picture from a Boat
(Too much camera shake no matter what the ISO, aperture or exposure.)
Before you even plan your trip check the solar cycle and sun spot predictions. The solar cycle has a period of around 11 years for sun spot activity. Sun spots and solar flares are times when the solar wind flux is likely to be strong for optimal viewing of the Northern Lights, but note that strong solar flares can occur at any time.
Be prepared to move. If the weather is not ideal where you’re at and the forecast is lousy for the next week then consider heading to where the sky is clear. This might mean moving inland, or to the coast, or even to another country. Coastal regions in particular can cloud over in the early evening. You might do well to head inland looking for shielding mountains that preserve a clear night sky.
Allow yourself sufficient time on your expedition for all of the ingredients that make for stunning Northern Lights to come together. If you have just a day or two then you might luck in but more than likely you won’t. A week is a reasonable time frame, but a fortnight is even better.
Keep your rubbish and take it home with you. On one Northern Lights chase I had a quick look around before we left a site and was horrified by the amount of rubbish that folk had left behind despite the tour operator’s pleas.
Take only memories, leave only footprints.
Before you go out in the cold and dark check:
- the weather. If it is overcast, cloudy, raining or snowing then you’re likely to be for an uncomfortable night with no decent Northern Lights photo opportunities.
- the moon phase, rise and set times. A bright moon isn’t ideal for taking photos of the Northern Lights.
- sunset and sun rise. While taking photographs in the midnight sun is worth while of its own right (and kind of eerie) don’t expect to see the Northern Lights if the sun is in the sky.
- the solar wind activity. A really good spot measure is the solar flux prediction. There are several web sites with useful predictive data on Northern Lights activity. Try http://www.aurora-service.eu/aurora-forecast/ but be expected to be overwhelmed by all of the data. Find the Aurora Ovation Oval with a nice graphic and solar flux prediction measured Giga Watts (GW). The range is 5 to 150 GW. If the value is around 9 GW then you can expect to see the Northern Lights as a greyish white curtain or band in the sky. If the value is around 12 GW then, provided you preserve your night vision, you can expect to see green moving veils, curtains and swirls. If the value is above 13 GW then the display will become increasingly awesome with greens, perhaps reds and sometimes even deep reds and blues.
Photos of People
Seems like some folk are hell bent on a selfie with the Northern Lights in the background. If you are already taking good pictures of the Northern Lights then you can do this, but you will need a torch. Set up your subject with the Northern Lights in the background. Now focus the camera on the people (typically 3 to 5 m). Press the shutter, wait for the 2 second time out and then turn the torch on for between 0.5 and 1 second. The people in the frame need to stand really still throughout the exposure time to prevent blurring.
If you dispense with the torch you’ll get a silhouette. Try a few as these can make for great photos.
After the selfie photo remember to readjust the focus to infinity.
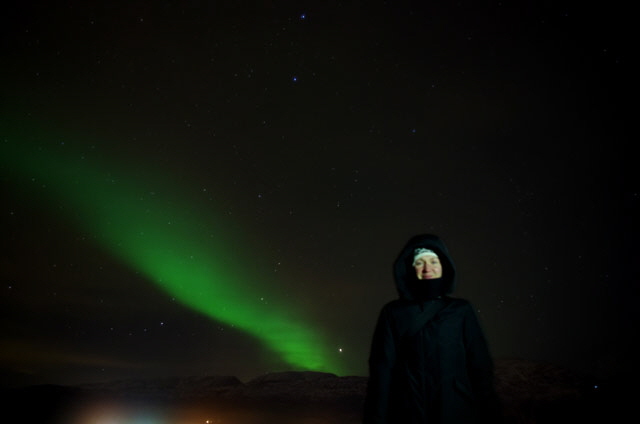
Figure 24. People Photo
Movies
If you search the interweb you’ll find some stunning movies of the Northern Lights. But if you try and take a movie (most modern Digital SLR’s will take high definition movies) then expect to be disappointed. Those great movies on the interweb are actually taken under ideal conditions with professional gear using time lapse techniques. The movie is then stitched together in the image processing laboratory. Hey give it a try, but don’t be disappointed if it doesn’t work (and I’ll refrain from saying I told you so).
Some Theory
Maybe physics is an anathema but a basic understanding what causes the Northern Lights may help you get the most from your experience. Feel free to skip this section entirely.
Our sun is a big nuclear fusion reactor, turning light elements into heavier ones (mainly hydrogen to helium) and emitting energy in the form of radiation across a broad range of frequencies. We see the visible bands of radiation as daylight. The radiation travels at the speed of light taking about 8 minutes to travel to the earth.
The suns corona (a very hot plasma atmosphere) also emits billions of charged particles per second that are collectively called solar wind. The solar wind consists mainly of electrons, protons and alpha particles. They travel much slower than the speed of light, taking up to two days to reach earth.
The solar wind contains a lot of energy, and if the bulk of it wasn’t defected by the earth’s magnetic field, conditions on earth wouldn’t sustain life as we know it (ask a dinosaurs about this). Earth is truly a Goldilocks planet and some day we may actually start looking after it.
The earth’s magnetic field is similar in shape to an apple cut in half. The flux lines are parallel to the earth’s surface near the equator and vertical to the surface near the poles (like the top and bottom of an apple’s core). The actual shape of the magnetic field is highly distorted by the solar wind, compressing the field lines on the solar side and stretching them out away from the sun. As an aside you might be interested to know that earth’s North Pole is actually a magnetic South Pole which is why the North magnetic pole of a compass points North. One day this information might be useful when playing trivial pursuits.
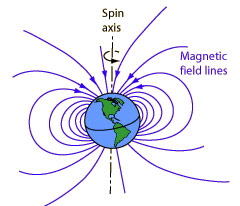
Figure 25. Simplified Representation of Earth’s Magnetic Field
(Image stolen from interweb.)
When charged particles move through a magnetic field they experience a force orthogonal to the particle velocity and the flux lines (budding electrical engineers and physicists should look up Lorentz Law). This is the very same interaction between moving charged particles and a magnetic field that causes an electric motor to spin. Near the equator the solar wind is deflected away from the surface of the earth and off into deep space, but near the poles the earth’s magnetic field forms a vortex that deflects the solar wind towards earth’s atmosphere.
The earth’s magnetic pole is tilted by about 15 degrees to the orbital plane about the sun so the impinging solar flux intensity varies over a 24 hour period.
When all of these high energy particles near the poles collide with the gas molecules in the atmosphere the gas molecules are ionised. This changes the energy of the outer level electrons in discrete steps (discrete is the reason for quantum in quantum physics). The excess charge is eventually released as a photon (light particle or wave) when the gas molecules relax to their normal energy state. The photons also have discrete energy levels corresponding to different colours, and when there are enough of them we see the Northern Lights.
The colour of the Northern Lights depends on the gas molecules and the energy of the solar wind. The emission spectra of Oxygen and Nitrogen are shown as bright bands below and, subject to the solar wind flux intensity, we can expect to see a mixture of these colour bands in the Northern Lights.

Figure 26. Emission Spectra of Molecular Oxygen and Nitrogen
(Image stolen from Interweb.)
At the surface of the earth the composition of the atmosphere is 78% Nitrogen, 21% Oxygen, 0.9% Argon and trace amounts of other gases. But at very high altitudes (say 100 to 200 km) Oxygen is the is the predominant gas molecule involved and this produces green and red. At lower altitudes the atmosphere contains increasing amounts of Nitrogen. Nitrogen produces blue, bright green, and deep red wavelengths. But a strong solar wind flux is required to penetrate this low in the atmosphere so visible blues and deep reds are relatively rare events.
The human eye spectral response is strongest for green light. Even though the Northern Lights will be producing a wide range of colours we will tend to see green at lower solar wind flux levels even through reds and blues will be present. Your camera has been designed to have a similar spectral response to the human eye. But large aperture settings and long exposures means that your camera will collect far more light than your eye. This is why the Northern Lights may look greyish-white to you and show up as classic green in your photos.

Figure 27. Human Eye Spectral Response
(Image stolen from interweb.)
Hopefully this page will help you see and take some memorable photographs of the Northern Lights. If you have any other tips, techniques or criticism then please contact me with the aim of helping others get a tick on their bucket list.
|