|
Errata. Sometimes I get stuff wrong. The Z axis lift and retract on the Saturn 2 is not a ball screw but a lead screw. I’ve been calling it a ball screw for almost a year based on a photograph of the thread profile and my memory of exposed ball bearings from disassembly almost a year ago. As a consequence of this error there is a faster way to clean the lead screw although it involves some disassembly. Click here for the fast method.
A better title for this page might be Cleaning and Re-lubricating the Z Axis Rails, Lead Screw, and Carriages. My apologies for the quality of some of these images. They aren’t my best photography due to poor lighting and one-handed camera operation but they should still illustrate the relevant text.
There are very few moving parts in your Saturn 2 SLA printer. There’s the UV COB LED array cooling fan, stepper motor complete with bearings, a bearing in the plastic housing at the top of the Z column, and the Z axis linear rail and lead screw carriages. Only the lead screw (and to a lesser extent the linear rails) need cleaning and lubrication.
Over time you’ll see that the grease on the lead screw becomes increasingly black, particularly below the build plate. This is caused by microscopic metal particles that result from wear of the ball bearings and shaft under pre-load in the carriage. The contaminated grease becomes increasingly abrasive resulting in accelerated wear.
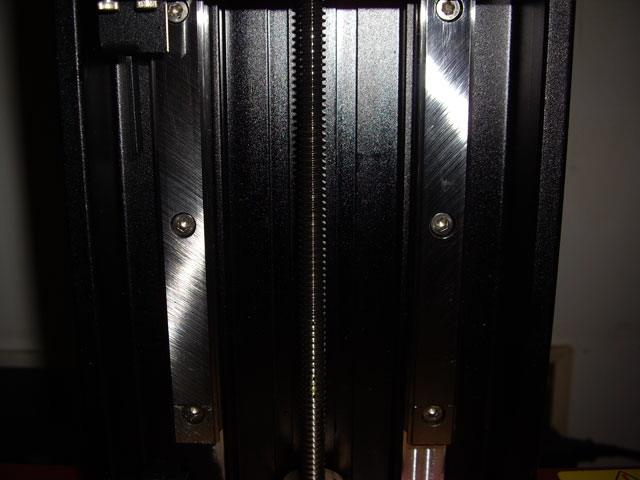
Figure 1. Ball Screw Coated in Black Contaminated Grease
So I contacted Elegoo. Initially they tried to sell me a new lead screw (complete with stepper motor). After further correspondence they advised wiping the contaminated grease off the screw and rails and applying more grease to the rails and screw. I assure you this is totally ineffective.
Disassembly of the carriage is not recommended. It is very messy and involves removing the Z axis top plate. The ball bearings in the linear rails may come loose and refitting them is not straight forward.
Note that there are no grease nipples on the linear rail or lead screw carriages. So it’s not possible to inject new grease to displace the old contaminated grease. But in any case most manufacturers don’t recommend doing this even when grease nipples are fitted.
So how do you clean and lubricate the lead screw and linear rails?
After researching linear bearing and lead screw manufacturers’ maintenance guides I have come up with the following method for cleaning and relubricating the lead screw and linear rails. It isn’t Elegoo’s procedure but it works. It took less than an hour on my Saturn 2 which has had moderate use over more than 12 months. If you have come up with a better procedure then I’d love to hear from you. Please email me.
Video Link. Click on the image or this link to view on YouTube
You’ll need some white lithium grease (just a few mL), mineral turpentine, a small syringe or eye dropper, and lots of paper towel or tissue.
- First remove the resin vat and build plate and place a piece of MDF or plywood over the printer deck to protect the LCD.
- Wipe any grease from the ends of the carriages, the rails and the lead screw with a paper towel dampened with mineral turpentine. Note that regular IPA, ethanol, or methanol are ineffective as a solvent for white lithium grease.
- Move the build plate arm to Home.
- While stepping up 10 to 20 mm inject about 0.5 mL of turpentine from a plastic syringe or eye dropper directly onto the top of the ball screw carriage by the screw.
- Press a paper towel dampened with turpentine against the ball screw below the carriage. Move the carriage upward in approximately 20 x 10 mm steps to near the top of travel.
Cautions:
Do not drive the build plate arm into the Z column top plate as there is no travel stop.
Only apply the paper towel at the trailing edge of the carriage to avoid binding in the lead screw.
Do not use a rag. Paper will simply tear if it becomes bound while a rag can result in damage to the lead screw carriage or injury.
- Apply a further 0.5 mL of turpentine to the top of the lead screw carriage stepping up 20 mm.
- Press a clean area of the paper towel to the ball screw above the carriage and move to Home.
Repeat steps 4 to 7 until the paper towel is free from contaminated grease. This can take 10 or more cycles.
- Wipe down the linear rails (front and sides) with a paper towel dampened in turpentine.
- Apply white lithium grease in small dabs every inch or so directly to the ball shaft and to the front and sides of the linear rails. Move to the top of travel and return Home a few times.
- Wipe any excess grease from the ends of the carriages.
- Now’s a good time to level at Z=0 before refitting the resin vat.
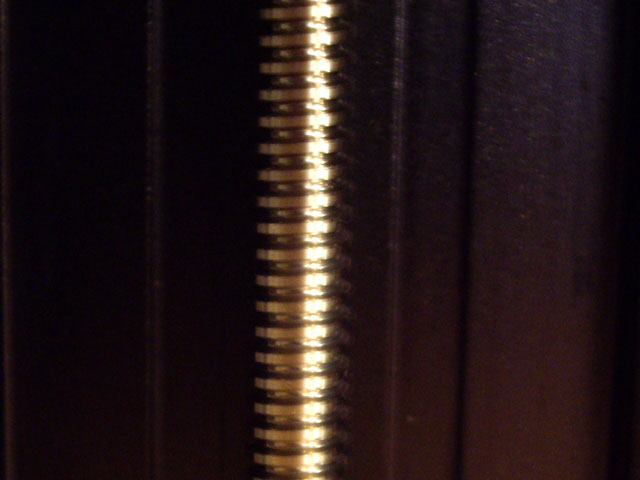
Figure 2. Clean Lubricated Ball Screw and Carriage ready for Another 1,000 km
How Often Should You Clean and Re-lubricate?
Lead screw manufacturers’ recommendations for cleaning and re-lubrication vary considerably up to 800 run hours, six months elapsed time, and up to 1,000 km of travel. Note that a Saturn 2 running 24/7 at the maximum Z axis speed would take 165 days to reach a Z travel distance of 1,000 km.
The Saturn 2 loads and travel speed are relatively low so my recommendation is 12 months for high duty, perhaps 2 years for light duty. And re-lubricate any time you suspect binding of the linear rail or lead screw carriages.
The Fast Method
Disclaimer. I haven’t actually done this as a complete procedure yet. But I have completed the individual steps without damaging my Saturn 2. It should be more effective and considerably faster than the procedure above.
You’ll need some white lithium grease (just a few mL), mineral turpentine, Allen keys, and paper towel or tissue.
Follow Step 1 above.
Undo the two hex screws that hold the Z column top plastic cover in place and remove the cover.
Undo the two hex screws that attach the lead screw carriage to the Z arm. The Z arm will drop on the linear rails.
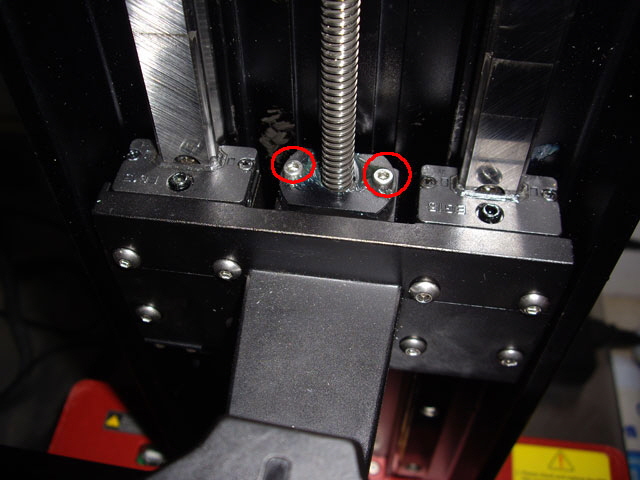
Figure 3. The Lead Screw Nut Hex Screws
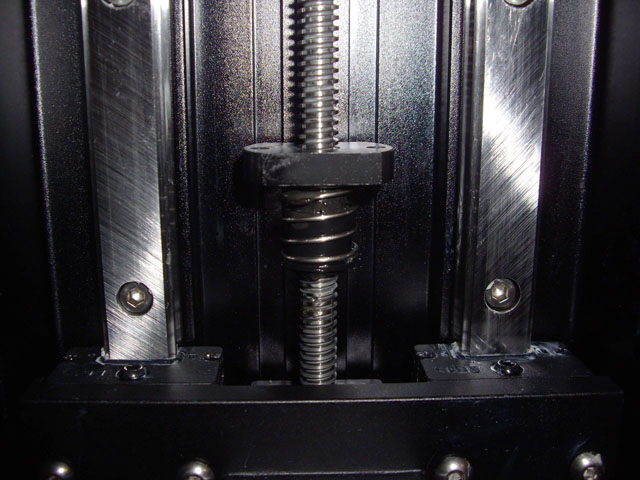
Figure 4. The Lead Screw Nut
(Note the backlash spring.)
Remove the lead screw nut from the lead screw either by manual turning or by using Manual Lift from the touch LCD.
Clean the lead screw nut and the lead screw with mineral turpentine and paper towel.
Reassemble.
Follow steps 8 to 11 above.
A reader has identified the OEM for the linear rails ‘The blocks are marked EG15 so I think it's likely they are these https://www.hiwin.tw/products/linear_guideway/eg.aspx’ and confirmed that there is a better way of re-lubricating these. The machine screws on the top of the linear rail carriages access ports that can be used for lubrication. Remove the screws, apply white lithium grease using a small syringe until grease oozes from the ends of the carriages. Replace the screws and wipe off any excess grease from the top and bottom of the carriages. How hard was that?
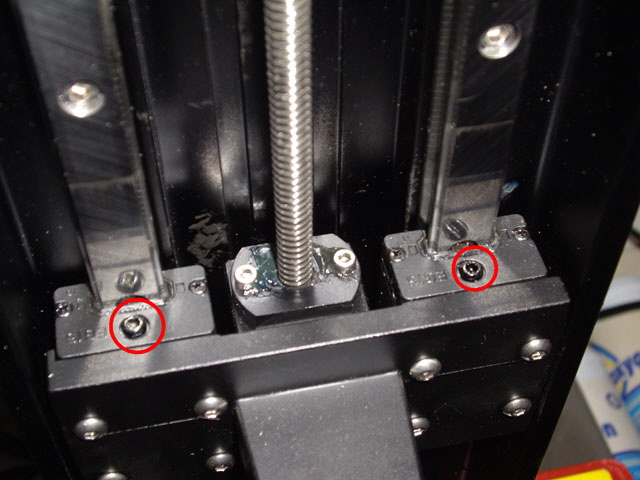
Figure 5. Grease Ports on the Linear Rail Carriages
Click on Saturn 2 to return to the Saturn 2 home page.
|