|
Over time I have assembled an extensive laboratory including all manner of glassware and precision analytical instrumentation. From time to time stuff simply wears out, breaks, gets corroded or contaminated and needs to be replaced; or I need something new.
3D printing can be effective provided that you choose and appropriate filament material for the reagents and given that the part is not subject to excessive heat.
The actual parts are quick to make and cheap which makes them disposable - avoiding issues such as contamination. Good seals can be achieved for ground glass fittings otherwise threaded fittings or O rings will be required. I’ll be adding to this page as I have a need to print more stuff.
Reagent Bottle Caps
During a recent inventory I found that many of my reagent bottle caps had become brittle and had fallen to bits. The original caps were nylon which is good for a heap of reagents including sulphuric, nitric and hydrochloric acid (concentrated and dilute) and performs better than glass stoppers for sodium hydroxide (which tends to cause glass stoppers to fuse).
PLA is a quite resilient plastic that show good resistance to many common reagents and aqueous solutions. However it is not suitable for chlorinated hydrocarbons and benzene. I figure I can 3D print some replacement caps.
I set out using an existing ST 16 nylon cap as the basis for my model, measured it, drew up a replacement and printed it in PLA. The replacement stopper was a reasonable fit but not perfect - the taper was not precise enough. I checked the taper dimensions based on the ISO 383 taper Standard of 1:10 and sure enough my print was out by about 0.3 degrees.
- When making stuff that conforms to a Standard use the Standard to determine critical dimensionality such as tapers. Then adjust the print to make allowances for printing tolerances.
I adjusted the model based on the Standard 1:10 taper but the resulting cap was about 0.4 mm undersized. I increased the critical diameter and the resulting cap was damn near perfect with good contact over the entire taper. Minor surface imperfections were readily removed by rotating the printed cap in the ground glass fitting.
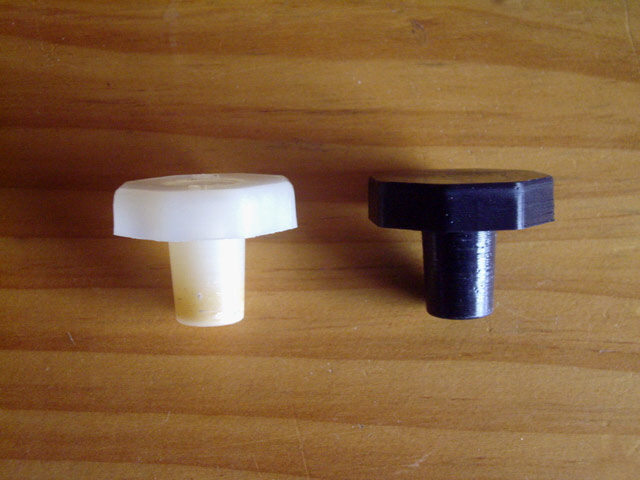
Figure 1. Reagent Bottle Cap
The resulting cap is water tight but not gas tight due to porosity in the print (actually most plastics are porous or absorb water - even when injection moulded) . Solvent sealing of the printed part is warranted. Gas sealing can also be enhanced by increasing the number of external print layers and forcing solid infill layers every few millimetres (say 20 layers on a medium resolution print). Actually a total gas tight seal may not be desirable as temperature changes may force the cap to pop loose or cause it to lock under internal partial vacuum.
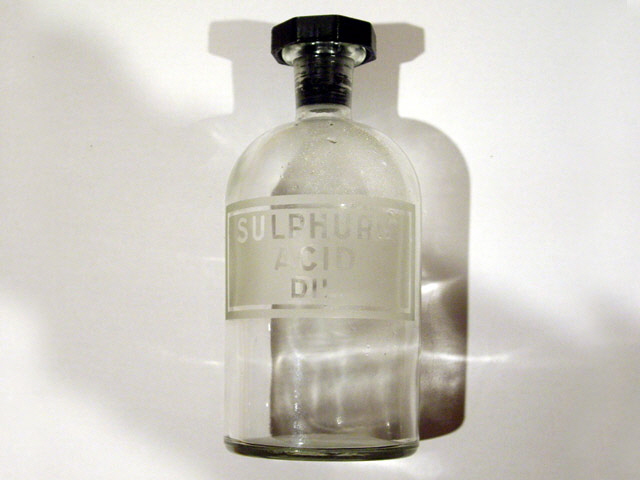
Figure 2. Reagent Cap Fitted
Bungs and Corks
PLA and ABS are not soft enough to make bungs and corks - but when used with rubber O rings we can make all manner of effective bungs and corks that, with solvent vapour sealing, make a good gas tight seal. Make the base part for a free running fit and incorporate O rings in recesses to form medium compression seals. I have used double O rings on internal seals for a smooth fit with excellent mechanical support. While making bungs and stoppers with holes for tubes and funnels is relatively straight forward be prepared to make a number of prints to get the fitting just right. Chances are that the glass section that you are trying to fit to is not perfectly cylindrical. But note that a good fit with O rings will make for easier fitting and removal of glass tubes and funnels than with rubber bungs and corks.
The standard taper for bungs and corks is 3/16” diameter in 1” of length, but this is not suitable for a rigid PLA stopper. You will need to under/over-size the print for external/internal diameters by as much as 1 mm and maybe adjust the taper. My first bung took six prints to get exactly right. Three were required to get the dimensions correct, one failed due to dragging of the excess filament from the wipe cycle at the start of the print, and two were caused by a USB communications failure between the computer and the M2.
Note: I’ve recently purchased some NinjaFlex filament and this will produce excellent bungs and corks without O Ring seals, straight off the M2 print bed.
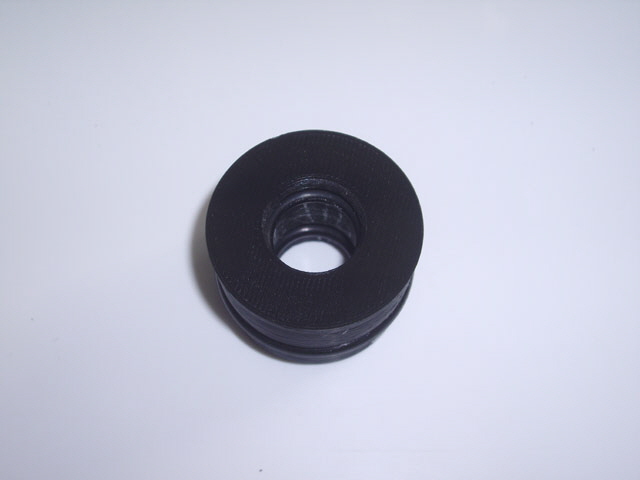
Figure 3. Bung with Double Internal O Ring Seal
Buchner Funnels
A Buchner funnel is used for vacuum assisted filtration. In essence this is a regular funnel with a sintered mat or screen for filter paper support. Even a relatively poor vacuum significantly speeds up filtering, washing and drying over using gravity alone. Using a regular funnel with flute folded or dual folded filter paper won’t work under vacuum. The filter paper will fail at the neck of the funnel.
A ceramic Buchner funnel is relatively expensive (say $150) but we can use a 3D printed circular mat to convert a regular glass funnel to a Buchner funnel for a print cost of about 50 cents.
For a really fine filter medium we can use the porosity of the 3D print to form a sintered mat. For faster filter action we can use the 3D printed infill as the filter paper support medium (by not printing top and bottom layers).
- Set the top and bottom number of print layers to zero to expose the infill pattern when making a screen or filter. This saves a heap of drawing effort and gives a number of screen patterns including square, triangular and hexagonal.
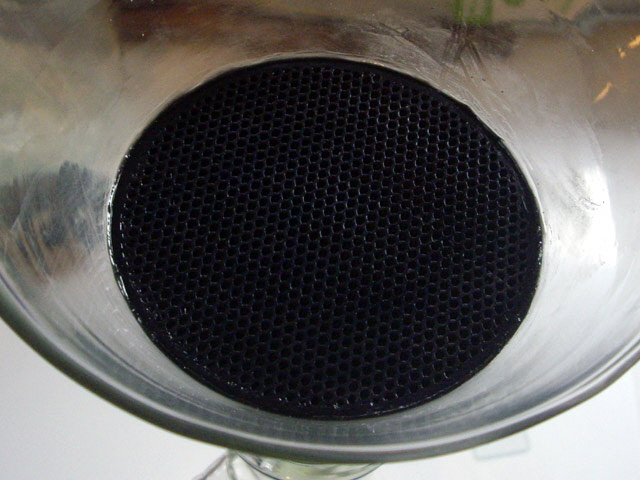
Figure 4. Mat with Hexagonal Infill Forming Filter Medium
Many standard funnels have a 60 degree taper which makes it difficult to securely fit the 3D printed mat in the funnel without making extensive support structures. Imperfections in glass funnel circular cross sections also make forming an effective vacuum seal between the mat and the funnel difficult. The trick is to use silicone rubber adhesive to adhere and seal the mat in place.
Ensure that you incorporate sufficient outer layers in the print to extend from the edge of the funnel to beneath the filter paper. The width of horizontal print layers will depend on your printer set up but figure on 0.4 mm of width per layer with a medium resolution print on a MakerGear M2 with a 0.35 mm diameter extruder.
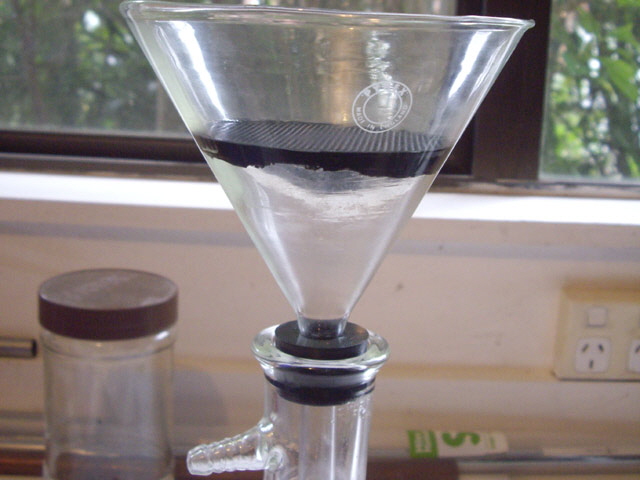
Figure 5. The Finished Buchner Funnel
(complete with 3D printed bung)
The mat size should ideally suit the diameter of the filter paper that you intend using, but cannot be so large as to eliminate the free-board between the mat and the funnel lip. This space is necessary for the loading the filter paper. Real Buchner funnels have vertical sides to increase the free-board without increasing the diameter. I settled on a 95 mm diameter mat to fit standard 90 mm diameter Buchner filter papers.
In more recent times I have remade the bung for a real Buchner funnel printed in NinjaFlex filament. This does away with the need for O rings. The flexibility of the bung makes for easier insertion and removal, and vacuum leakage through the part is minimal.
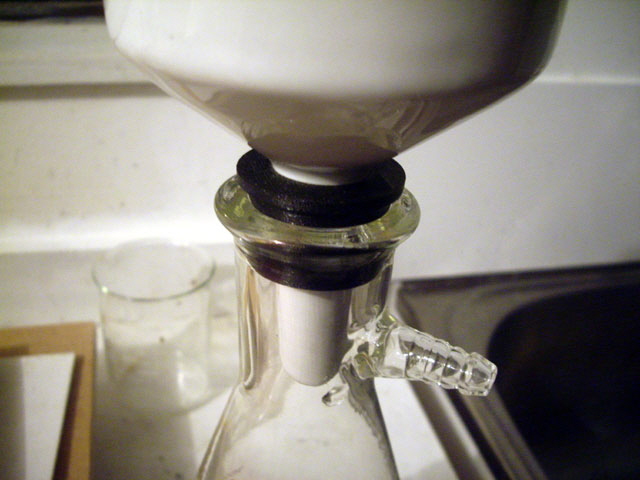
Figure 6. Improved NinjaFlex Bung for Buchner Funnel
Click here to navigate to surface finish...
|