|
With the death of my Pentax 750Z due to salt water immersion, and without the inclination to part with hundreds (or thousands) of dollars for a new camera and housing, and with my pending trip to Fiji for my Rescue Diver Course, I decided to make a new camera housing for my Pentax A20. Go to the drawings page for plans.
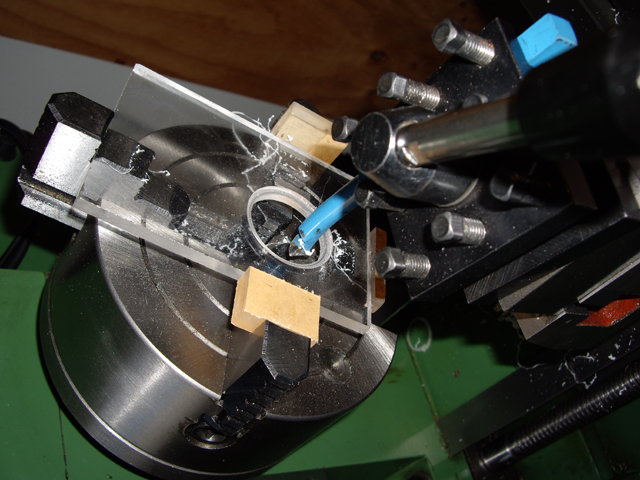
Figure 1. Boring the Lens Housing Mount
The basic case is the same design that I used for the 750Z re-dimensioned to suit the A20. I reduced the thickness of the front and back plates from 10 mm to 6 mm. The only other substantial modifications were pads on acting surfaces of the controls to avoid scratching the camera and adjusting the control seals.
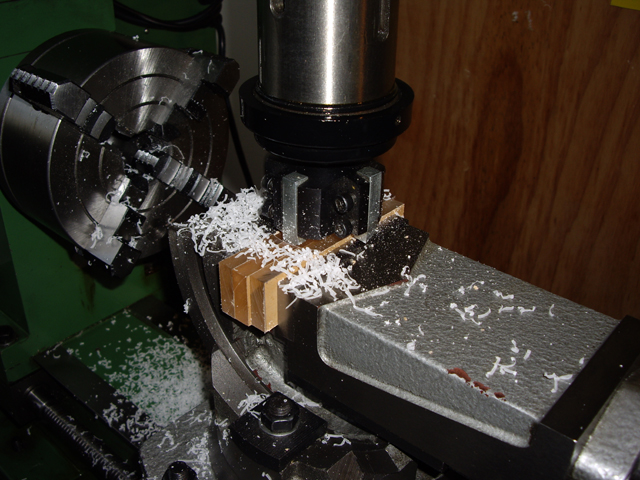
Figure 2. Milling the Sides to Width

Figure 3. Assembly before Gluing
The A20 is smaller and lighter than the 750Z and does not have any rotary controls. However it requires nine push buttons for all operating modes and this does not include the menu, green function and playback. I figured that these last two would not be required sub-aqua.
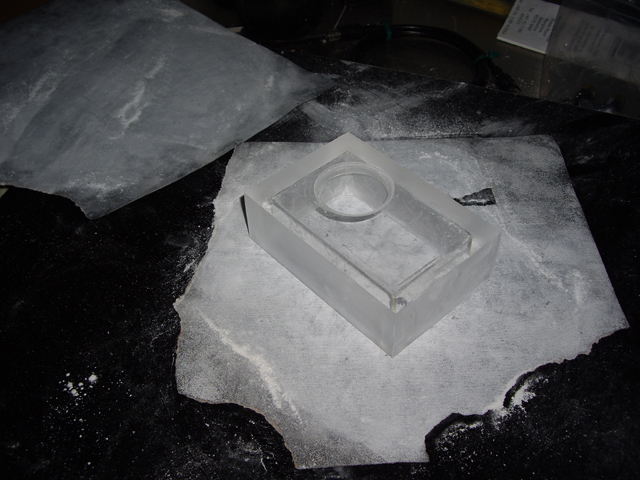
Figure 4. Sanding the Back Dead-Flat
The case and lens housing were made over a weekend. The nine control buttons and the toggle anchor took the best part of another day to machine. I had run out of circlips from my derelict printer collection and O rings, so the project is not quite complete but I still have 5 days before I head off to Fiji.
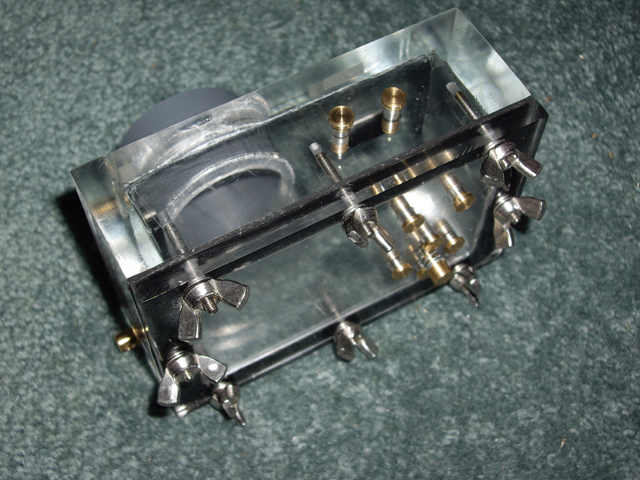
Figure 5. Back View, Finished but for some O Rings, Springs and Circlips
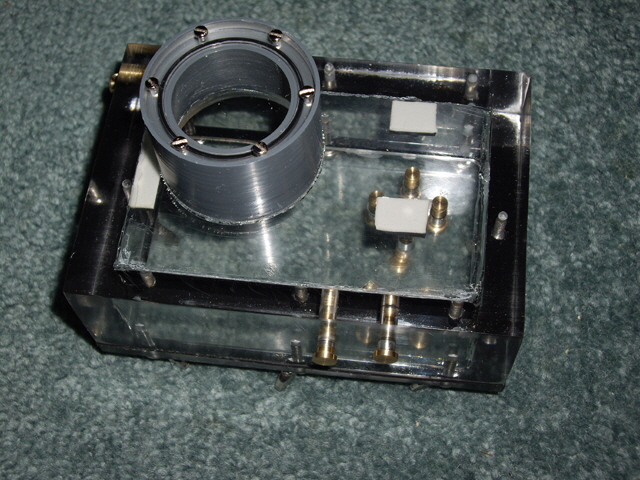
Figure 6. Front View
I just managed to get the housing finished before my dive course. The turtle-tank test was a success so the camera housing was off to Tokoriki, Fiji, for field testing. Don’t you love tropical water at a temperature of around 25°C? I threw caution to to the wind and put my A20 into the housing on my first recreational dive. At about 3 m two of the seals developed leaks so the housing was immediately returned to the dive boat. Darn! there would be no underwater photos from this trip.
Actually that’s not entirely true. On two of my recreational dives I had the pleasure of being accompanied by Samona and Michele. Michele had a digital camera and took some great footage of a white tipped reef shark and a sea turtle which I hope he will forward for publishing.
With the camera removed from the housing, and none the worse for the experience, I took the housing to the dive training pool to investigate the leaks. The pool confirmed that at least one of the seals was leaking at a depth of approximately 1.8 m.
On returning to God’s Own (New Zealand) I disassembled the controls and inspected them. In my rush to get the housing completed before the trip I had not measured the depth of the O ring grooves, relying on machine technique and the collar graduations on my lathe to overcome slop. I had designed them with an internal diameter of 3.00 mm but while machining I had over-cut the grooves on the two control seals to 2.65 m. The other control grooves were all 3.00 mm +/- 0.05 mm. No wonder these grooves weren’t sealing! The O ring compression was a meagre 5% when it should have been up to 30%. With limited compression the O Rings could roll when the controls were pressed and machine marks on the brass and Perspex would not be effectively sealed. I also found a piece of swarf on one of the leaking seals.
It looks like I’ve found the problem with the A20 housing which begs the question, ‘was this also the cause of the leaks with my old 750Z housing?’ I measured the groove clearance on the shutter and on/off controls. Sure enough the on/off control was cut undersize at 2.84 mm. The O ring compression was figured to be no more than 12%. This, in combination with damaged O rings, was quite likely to have been the cause of the 750Z leaks.
Over the next two evenings I remade all of the control seals for the A20 housing with a measured groove internal diameter of 3.10 mm +/- 0.05 mm (O rings in dynamic seal applications should be stretched approximately 2%). I also adjusted the spacing between the seals to ensure at least 1.5 mm between the outer edges of the grooves and the case surfaces. I have updated the drawings to reflect this.
While I was messing about I figured it was time for some stainless steel compression springs. Century Springs have an excellent range of compression springs in stainless steel with ground, coiled ends. I have ordered ten of each of three spring types.
This evening I have placed the housing back in the turtle tank for another immersion test. No leaks but the housing was immersed in just on 750 mm. Back to the pool for 1.8 m. Excellent, no leaks. I have booked another dive at the Poor Knights with PK Dive this weekend to test the housing at depth with a dummy 142 g load prior to subjecting my A20 to another trial by water.
On arrival at the dive site the first mission was to attach the camera housing to my 50 m line with a weight and send it to oblivion to test for leaks. No leaks at about 30 m. The first dive went without a hitch and the reworked housing and all controls were completely water tight to the maximum dive depth of around 20 m. The photos and movies can be viewed here. I suspect it will take me a few more dives to figure the best settings for the camera to ensure optimum settings for focus, flash, ISO number, etc.
On the second dive the camera had locked up with power off and the lens extended. I suspect that this was due to a combination of low battery, cold water, and perhaps battery contacts. The camera reset just fine after I had ascended, removed it from the housing, and removed and replaced the battery.
When the new stainless steel springs arrive I’ve decided to polish the control seal holes, make a new rear gasket and rework the camera rubber mounts just to make sure that the camera hadn’t been subject to a pressure squeeze at depth.
I have fitted the new springs, polished the holes and made a new gasket. One slight problem, and one that that I have experienced previously, is that when left for a few days the controls stick. The O rings are binding to the case. I would like to try Teflon O rings but these aren’t readily available so I thought I’d try using a different lubricant, Aquanaut Silicone Grease. During my dives on the 13 October several of the control buttons stuck on, causing the camera to lock (similar to the lock-up issue reported above). While still submerged, I freed the control buttons and power-cycled the camera. Everything burst back into life. Back on dry land I have removed Silicone Grease, replaced the springs with slightly stronger ones, relubricated the O rings with rubber grease, and after some trials with scrap Perspex re-drilled the control holes to 4.7 mm diameter. The controls move freely again and haven’t bound yet. All is well: no leaks, no more corrosion, and the prospect of lots more pictures and movies from my dives.
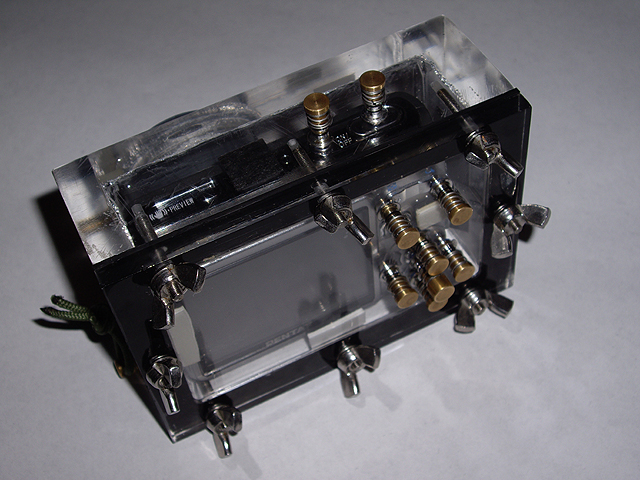
Figure 7. All Done - Back View
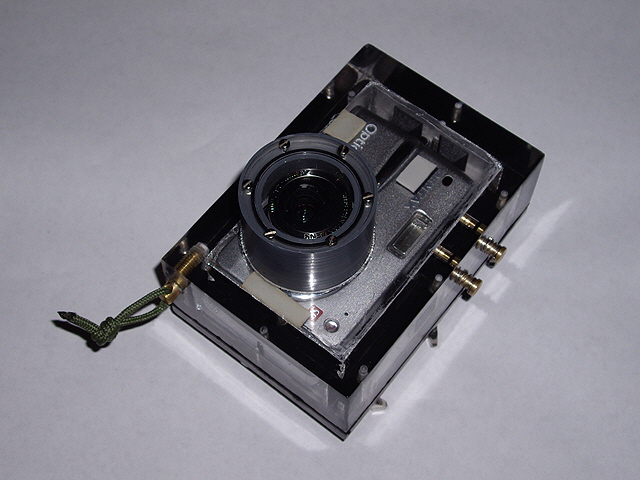
Figure 8. All Done Front View
That sticky control problem has come back to haunt me. Left for a few days the controls are still binding. The man at the O ring shop assured me it was the Perspex causing the problem. I dug out one of my early prototype controls for my Pentax 330 housing. This was made entirely of brass and had been sitting unused for months. I pressed the control and it worked smoothly with no binding. It was time to fit some brass sleeves to the A20 housing and be done with this problem. I machined up a prototype and made a trial sleeve (Figures 9 and 10). If this works in the field it could easily be modified with a screw thread and O ring for case mounting.
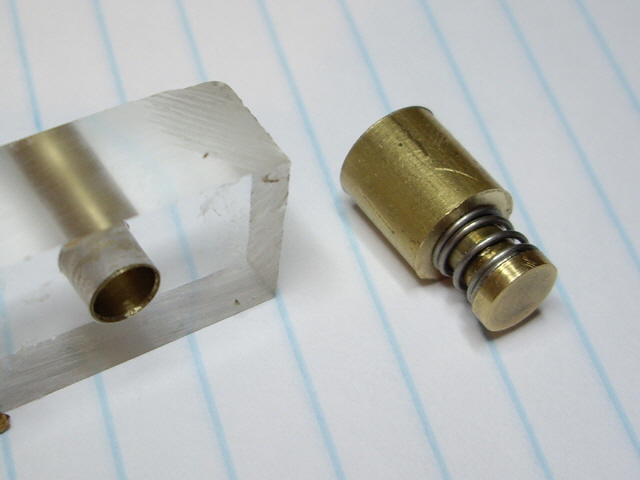
Figure 9. Prototype and Trial Control Sleeves
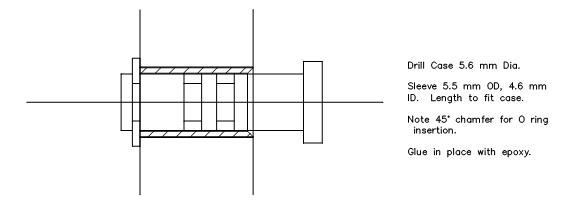
Figure 10. Control Sleeve Drawing
They worked beautifully, even with the internal dimension of the sleeve reduced to 4.6 mm diameter. I used two part epoxy adhesive to lock the sleeves into the case. I machined up a full set of nine sleeves in a couple of hours, drilled out the control holes on the case to 5.6 mm diameter and fitted the sleeves (Figure 11).
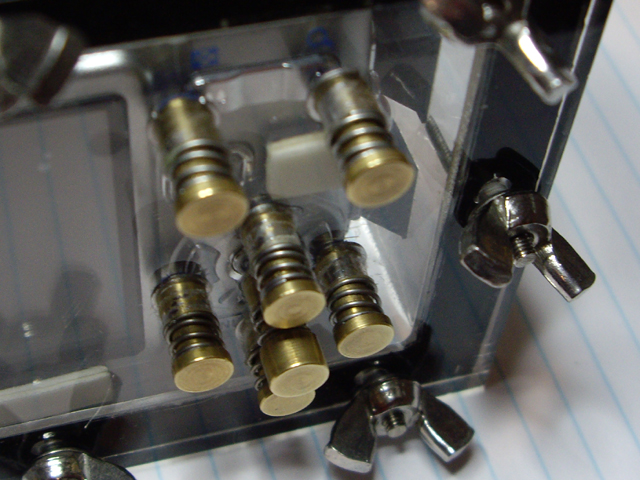
Figure 11. New Control Sleeves Fitted
After a couple of hours to let the epoxy set it was off to the Turtle Tank for water tightness trials. No worries there (Figure 12).
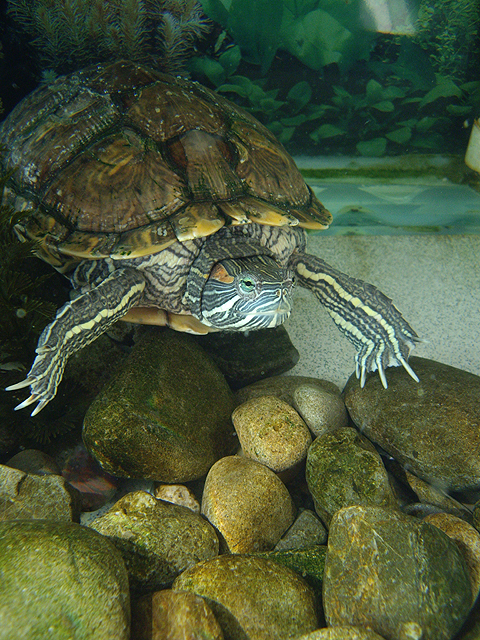
Figure 12. Louise Poses for Sleeve Trial
Now I need a week off to see if the controls will bind, followed by a deep dive to test that the O rings and sleeves are water tight and that the sleeves are mechanically sound at depth. If this is successful I will update the current drawings. All good so far. I’ve completed a 90 minute dive to 5.6 m with no leaks and no binding (more buddy locator field trials with not too much to photograph). The controls feel much better under water too. After a further four days there was some slight sticking in the fully extended position, but this immediately freed on the slightest press or rotation, and subsequently performed as first installed. All is good for now and I’m happy that the A20 housing should see me through my trip to the Galapagos Islands next month.
Darn, the housing didn’t perform flawlessly at the Galapagos. On the third dive it had started to leak. Investigation on the next dive showed that the O Ring seals were working perfectly but a leak had developed between one of the brass sleeves and the Perspex. This was entirely due to my poor efforts with the epoxy adhesive. I also found two damaged O rings that had been nicked by the springs on insertion but these weren’t causing any leakage problems. I’d packed some spare O rings but I had no workshop and no O Ring lubricant.
The dive shop kindly found me some super glue and I set about trying to repair the sleeve leak. The repair was only partially successful. I purchased some Silicon grease but the controls started to stick again so I abandoned the camera and set about enjoying the dive experience. Thankfully I have some good photos and movie footage from the first few dives.
On return home I heated the case to about 50°C to soften the adhesive and used a drill press to push out the sleeves, cleaned them and set about re-gluing them in place. The leaky sleeve was easily identified by the effects of the sea water on the brass. By the look of things a second sleeve was also close to failure due to poor gluing technique.
I had some more thoughts about the sticky buttons and after some research determined that the O Rings were over compressed. Firstly O rings should be installed with about 2% stretch and not more than 5% (which the current design achieves admirably). The stretch reduces the effective diameter slightly. Secondly dynamic reciprocating seals should have an O Ring compression between 10 and 15%. And finally the groove void should be at least 25% (again, which the current design achieves). On recalculation I had at least 20% compression. I drilled the sleeves out to 4.8 mm to provide 15% compression with an allowance for the reduction in O Ring cross section diameter due to stretch. Unfortunately this means the that clearance between the control buttons and the sleeves is too big. It should be just 0.1 mm but with the increased sleeve ID I have 0.3 mm. I guess I will be remaking the control buttons some time soon.
During my first dive at the Poor Knights on 13 January I tested the new seals with no camera in the case using the current control buttons. There were no leaks at 30 m but two of the controls remained slightly depressed by the pressure. The increased control button diameter (4.8 mm) increases the surface area so I therefore needed to change to harder springs or increase the pre-load. An alternative is to reduce the diameter of the O rings and controls. Commercial cameras use control buttons about 2.5 mm in diameter. The re-glued sleeves showed no signs of leakage or corrosion. On the second dive I fitted the camera and set about taking photos and movies to my hearts content to a maximum depth of 21 m. No leaks or other significant issues arose. I seem to be making progress at last.
I’ve identified some new stainless steel springs from the Century Springs catalogue that will meet my immediate requirements, but I am am keen to reduce the control button diameter to improve the feel. I need to visit the O Ring shop and see if they have smaller O Rings, and select some smaller springs . Then all I need to do is free up some time to make a new set of control buttons and sleeves!
Seal Validation
Its the weekend of the 26 October (my how time flies). My partner is crime’s watch, a 50 m Timex digital, broke last week, so I pulled it apart to examine the control seals. The basic design is very similar to my dual O ring seal, but much smaller, and Timex incorporate both O rings in the one groove. The bearing surface is the plastic case with a chamfer to allow insertion of the O rings, and a recessed groove for the spring.
The watch case seal is another O ring sitting in a groove in the plastic watch body with the stainless steel backing plate compressed against it by four stainless steel screws - very similar to the gasket design that I have settled on for the Buddy Locator case.
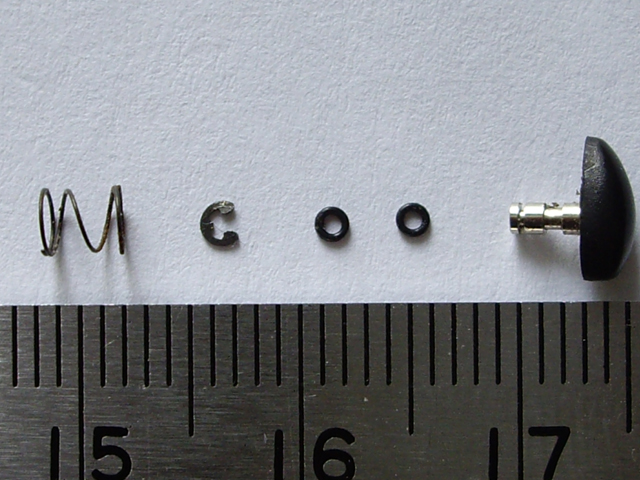
Figure 13. Watch Seal Rated for 50 m
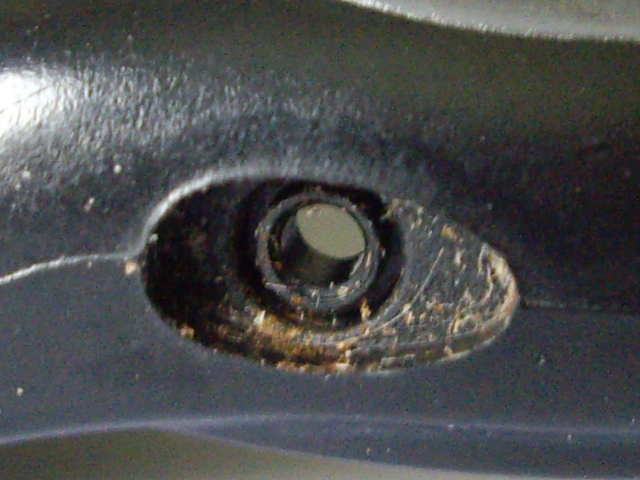
Figure 14. Watch Control Button Housing
The A20 housing has been working beautifully for over 6 months now, with no leaks and no performance issues. This project is therefore no longer work in progress. Now I just need to work on my underwater photography technique...
|